OVERVIEW
The Live Feed feature lets you display Eventbrite events directly on your website using a shortcode, no manual importing needed. Events are fetched live from Eventbrite and cached for performance.
CREATE A NEW FEED
Go to your WordPress admin and find “Eventbrite Widgets” in the left sidebar. On your first visit, you will be automatically redirected to the new feed creation screen.
Give your feed a name in the Title field (this is only visible to you in the admin, it does not show on the frontend).
The Feed Settings area below the title has 5 tabs:
- Source
- Display
- Tickets
- Filters
- Settings
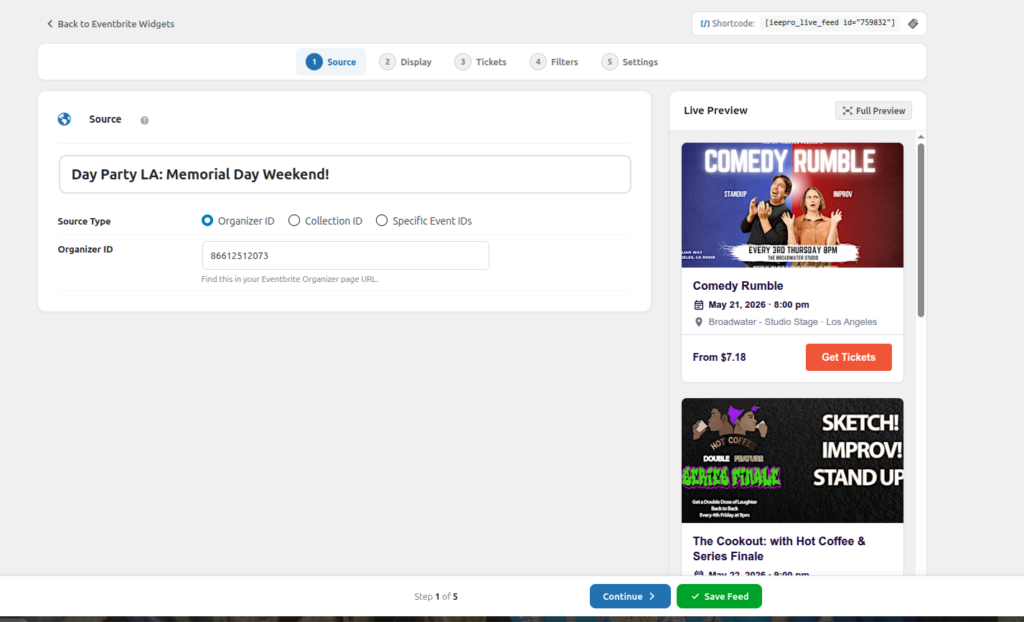
STEP 1: SOURCE TAB — WHERE TO GET EVENTS FROM
This is the most important step. Select where your events should come from. Choose one of the 3 configuration modes below:
FIELD OPTIONS BREAKDOWN & REFERENCES
ORGANIZER ID
- Description: Show all active events from a specific Eventbrite organizer profile. This is the most commonly used option for a continuous brand feed.
- How to use: Paste your numeric Organizer ID directly into this field.
- Reference Link: You can manage your Eventbrite profile parameters here: https://www.eventbrite.com/o/red-bull-racing-27864994065
COLLECTION ID
- Description: Show events from an Eventbrite Collection (a curated group or playlist of multiple specific events).
- How to use: Paste the unique numerical Collection ID into this box to cleanly stream that group layout on your frontend.
- Reference Link: You can get the Collection ID or look up your curated groups here: https://www.eventbrite.com/cc/race-screenings-2025-3910843
SPECIFIC EVENT IDs
- Description: Show only individual, specifically chosen events rather than an entire organizer stream.
- How to use: Enter unique individual Event IDs separated strictly by commas.
- Example: 111222333, 444555666, 777888999
- Reference Link: You can locate individual event parameters inside your core list here: https://www.eventbrite.com/e/gujarat-medical-expo-2026-tickets-1980364091307
STEP 2: DISPLAY TAB — LAYOUT AND FIELDS
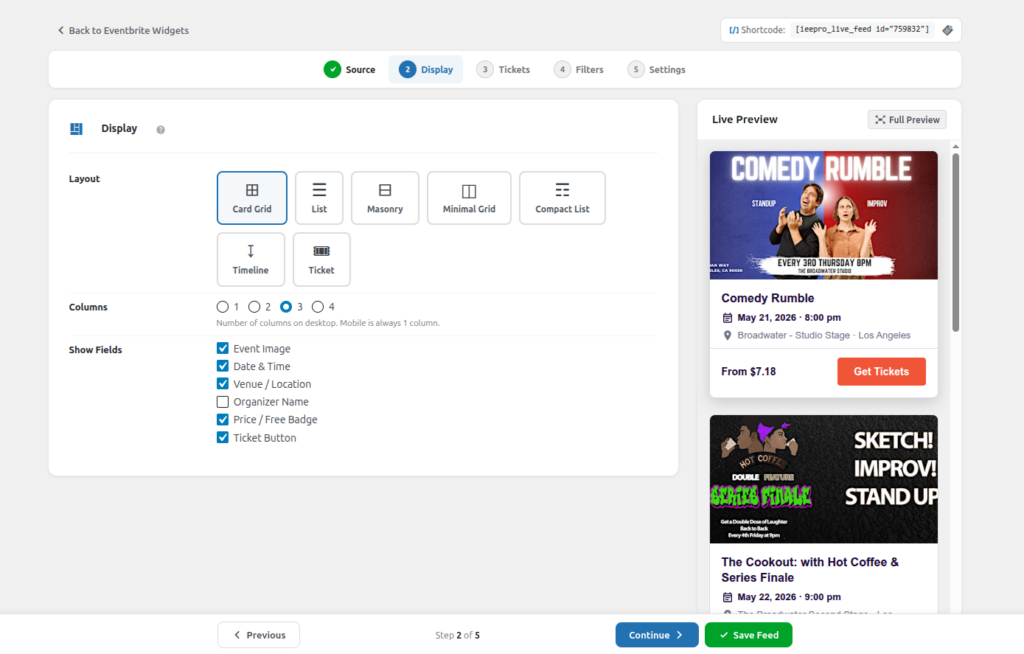
Choose how your events look on your live website frontend.
LAYOUT OPTIONS
Card Grid: Events displayed as interactive layout cards — image, title, date, and location bundled in one card block. Most popular sleek UI choice.
List: Events stacked cleanly one below the other. High-resolution thumbnail image displays on the left, descriptive details on the right.
Masonry: Fluid Pinterest-style responsive layout. Grid items have varying automatic heights and arrange organically based on image dimensions.
Minimal Grid: Simple, structured structural grid with fewer decorative accents and only essential metadata. Best for minimalist corporate sites.
Compact List: Fits a massive count of events in an extremely small workspace area. Shows only the title and date. Perfect for compact sidebar rows.
Timeline: Events ordered in an interactive chronological stream timeline format with scheduling dates highlighted prominently on the side margin.
Ticket: Custom ticket-style card presets featuring direct pricing parameters and a highly visible “Get Tickets” button format.
Choose how many horizontal columns to display across desktop viewports.
- Options: 1 Column, 2 Columns, 3 Columns, 4 Columns
- Note: Mobile views automatically responsive drop to 1 column layout seamlessly, no extra setup required.
SHOW FIELDS VISIBILITY SWITCHES
- Event Image : Toggle cover graphics layout visibility. (Default: ON)
- Date & Time : Toggle calendar timing strings. (Default: ON)
- Venue / Location : Toggle venue metadata and physical map text. (Default: ON)
- Organizer Name : Toggle company profile brand tag text. (Default: OFF)
- Price / Free Badge : Toggle price details or the “Free” ribbon. (Default: ON)
- Ticket Button : Toggle the primary action CTA registration. (Default: ON)
STEP 3: TICKETS TAB — CUSTOMIZE BUTTON AND LABELS
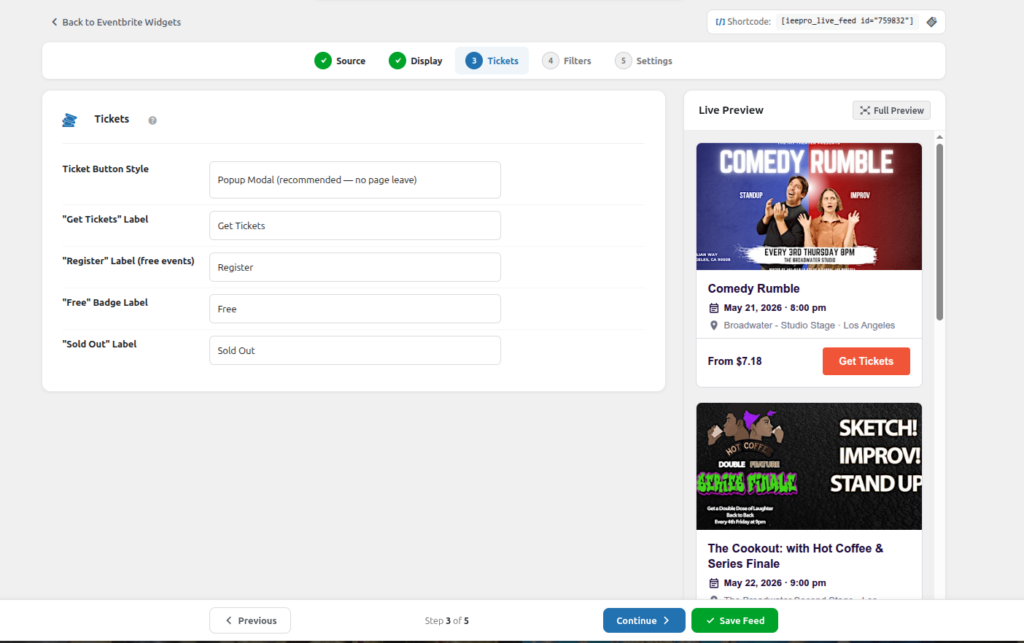
Customise exact action workflow paths and change text labels for easy localisation, translation or matching specific brand setups.
- Ticket Button Style
- Popup Modal (Recommended): A seamless secure modal overlay opens up right inside your page workspace, ensuring users complete checkouts without leaving your domain.
- Link: The active user is instantly redirected to the external Eventbrite portal window.
- “Get Tickets” Label
- Action button text layout for paid configurations. (Default: Get Tickets | Custom Examples: Book Now, Buy Tickets)
- “Register” Label
- * Button text mapping for free events. (Default: Register | Custom Examples: Sign Up Free, Claim Seat)
- “Free” Badge Label
- Badge text showing pricing status for non-commercial configurations. (Default: Free)
- “Sold Out” Label
- Status alert wording triggered when a listing runs out of inventory space. (Default: Sold Out)
STEP 4: FILTERS TAB — WHICH EVENTS TO SHOW
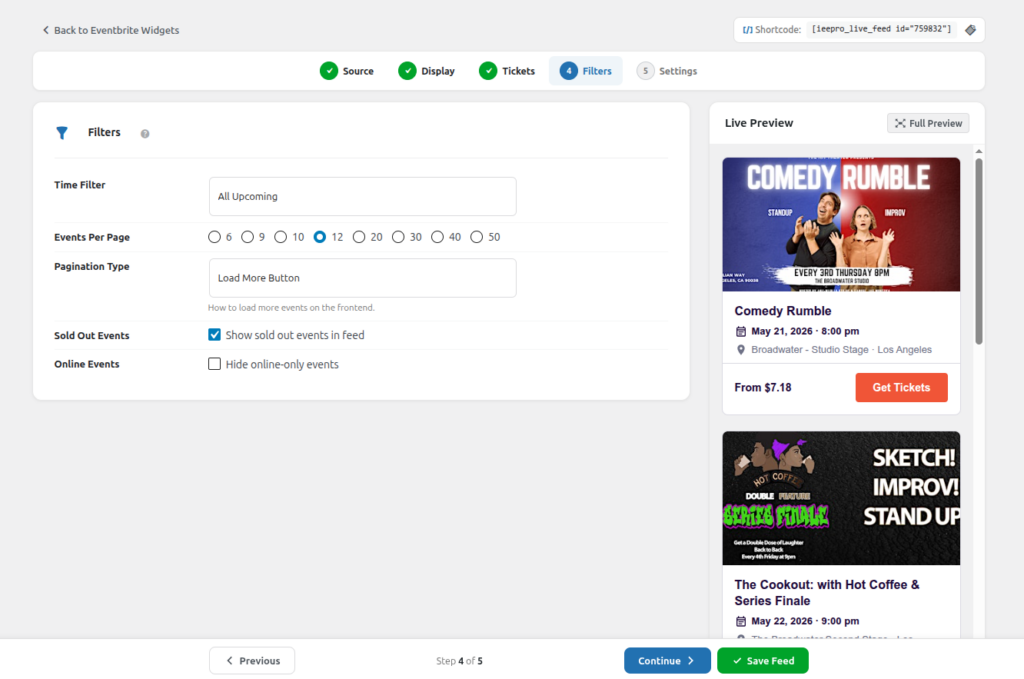
Filters empower you to control exactly what data records get rendered dynamically on your pages.
TIME FILTER CONSTANTS
- Today : Show only events running on the current calendar date.
- Upcoming Week : Display entries scheduled within the next 7 days.
- Upcoming 15 Days : Display entries scheduled within the next 15 days.
- Upcoming Month : Display entries scheduled within the current active month.
- All Upcoming : Streams all available future listings without any cap dates. (Most common operational setting)
- Past Events : Displays expired historical listings. Perfect for archiving setups.
- Custom Date Range : Specify strict filters manually utilizing the YYYY-MM-DD input format.
- All (No Filter) : Shows everything together, blending past and future entries simultaneously.
EVENTS PER PAGE LIMITS
Determine the total entry count displayed inside a viewport before pagination starts.
- Options: 6, 9, 10, 12, 20, 30, 40, 50
PAGINATION DESIGN ENGINE
- Numbered Pagination (AJAX): Clean standard pagination navigation digits (1, 2, 3…) that refresh the layout container instantly without reloading your entire web asset.
- Load More Button: Places a structural button container at the bottom margin which injects subsequent events downwards upon interaction.
- Infinite Scroll: Automatically tracks browser viewport scrolling to smoothly render upcoming items infinitely as a user scrolls down.
- No Pagination (Show All): Displays all matching queries instantly across a single layout canvas layer.
AVAILABILITY EXTENSIONS
- Sold Out Events: Check to include items that are completely out of ticket inventory. (Default: OFF – Hidden)
- Online Events: Check this option to filter out digital webinars from your local mapping feed rows. (Default: OFF – Shown)
STEP 5: SETTINGS TAB — CONFIGURE CACHE
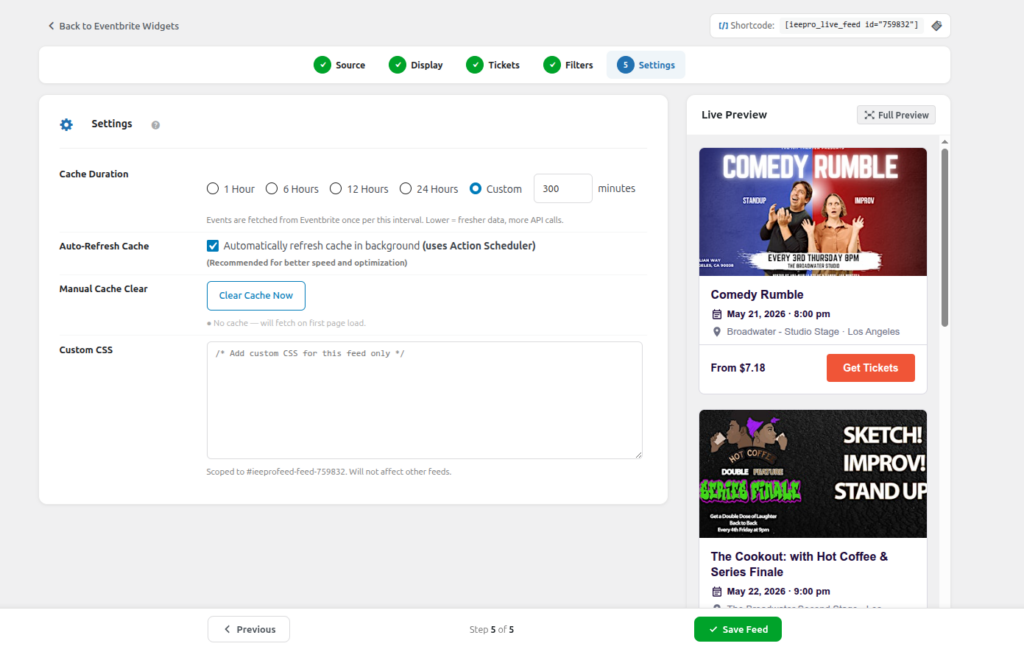
The system caches payload objects locally to minimize redundant external API call queries to Eventbrite, maintaining top site speeds.
Cache Duration
- Frequency intervals determining when the engine updates the content database.
- Options: 1 Hour, 6 Hours, 12 Hours, 24 Hours, or Custom (set in minutes).
- Recommended: 6 Hours or 12 Hours balances real-time updates and lightning-fast loading speeds perfectly.
Auto-Refresh Cache
- Automates processing loops quietly behind the scenes. Requires Action Scheduler framework layers. Highly recommended for background data synchronization.
Manual Cache Clear
- Force-flushes legacy storage files immediately. Simply click “Clear Cache Now” to push adjustments active live while setting up adjustments.
CACHE HEALTH STATUS CODES
- Green Dot = Cache layer active (Displays live expiration countdown timers).
- Orange Dot = Cache tracking expired; new feed sets will load automatically on the next front-end user trigger.
- Grey Dot = No historical cache built yet; will automatically pull data on the first front-end page request.
Once your design matches your layout goals, click the “Save Feed” control panel. An active shortcode element box will render your production snippets.
BASIC SHORTCODE STANDARD
[ieepro_live_feed id="5"]
INLINE ATTRIBUTE PARAMETER OVERRIDES
[ieepro_live_feed id="5" columns="2" per_page="6"]
The structural ID value maps exclusively to this unique layout configuration profile. Simply click the “Copy” module to save the code asset on your clipboard.
Open your page, post, or block workspace interface and drop the snippet key cleanly into position.
TROUBLESHOOTING
Events not showing?
- Double-check that your Organizer ID is correct.
- Clear the cache from the Settings tab.
- Try setting Time Filter to “All Upcoming”.
Feed loading slowly?
- Set Cache Duration to 6 or 12 Hours.
- Enable Auto-Refresh Cache (requires Action Scheduler).
- Shortcode showing nothing on the page?
- Make sure the feed is Published (not Draft).