From WP Bulk Delete Pro V1.2.0 we have introduced WP Bulk Delete Pro as an addon of WP Bulk Delete, so its need Free versionWP Bulk Delete to run. So you need to install WP Bulk Delete (Free). you can check how to install WP Bulk Delete (Free) from Here. Existing Customer: Please update Pro to 1.2.0 first then after install & activate free plugin.
2. Clicking on the link Will open a login form in Enter your login details in the login form and Click on the login button
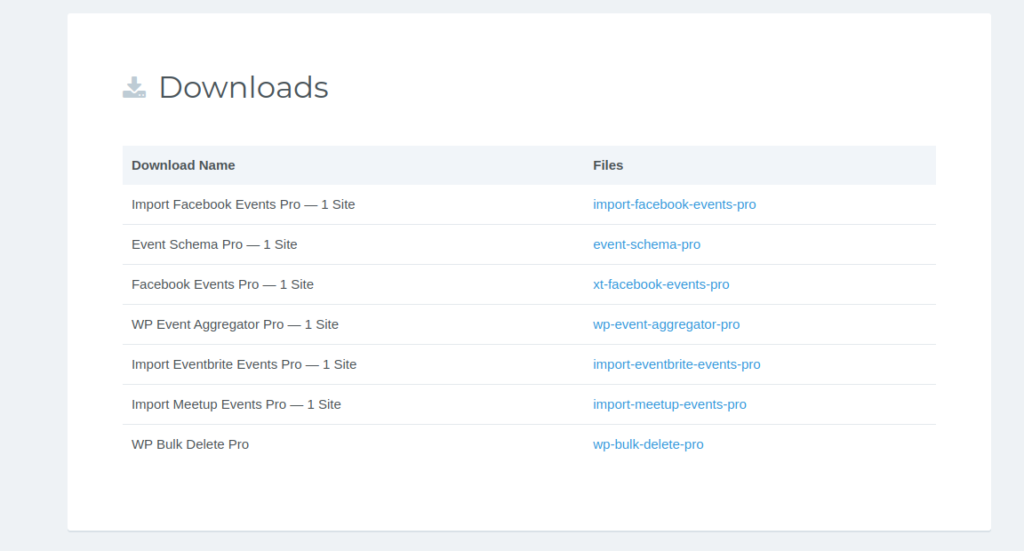
3. After clicking on the login button, the downloads section opens and by clicking on the name of the Plugin, the latest Pro version of the Plugin is downloaded.
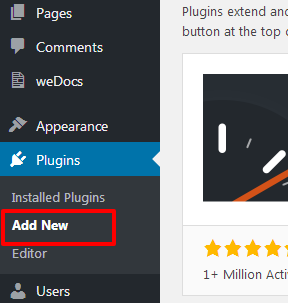
Step 3:
Log in and navigate to Plugins & Add New.
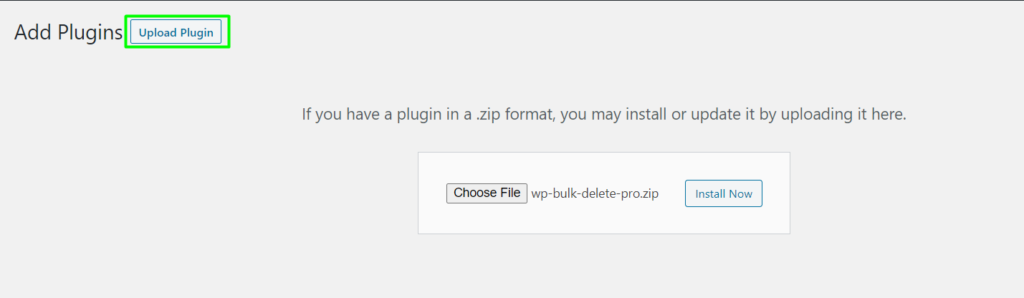
Step 4:
Click on Upload plugin button and upload “WP Bulk Delete Pro” zip file and click on install now button.
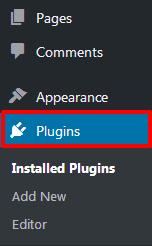
Step 5:
Locate “WP Bulk Delete Pro” in the list and click the “Activate” link.
It can also be installed manually.
1.From WP Bulk Delete Pro V1.2.0 we have introduced WP Bulk Delete Pro as an addon of WP Bulk Delete, so its need Free version WP Bulk Delete to run. So you need to install WP Bulk Delete (Free). you can check how to install WP Bulk Delete (Free) from Here. Existing Customer: Please update Pro to 1.2.0 first then after install & activate free plugin.
2. Download the “WP Bulk Delete Pro” plugin fromxylusinfo.com
3. Unzip the package and move to your plugins directory.
4. Log into WordPress and navigate to the “Plugins” screen.
5. Locate “WP Bulk Delete Pro” in the list and click the “Activate” link.