How to Setup and Manage Import Schedules in WP Smart Import Pro.
Automated Cron Scheduling allows you to import XML, CSV, or JSON data on a regular recurring basis without manual intervention. This guide explains how to configure and manage import schedules in WP Smart Import Pro.
First, navigate to the WordPress admin panel -> WP Smart Import -> Manage Schedules. You should see the following screen listing all active import schedules.

The Manage Schedules screen displays all import tasks that are currently scheduled or can be scheduled. The interface is divided into columns: Import, Frequency, Time, Next Run, Last Run, and Actions.
Step 1 : Set Frequency & Execution Time
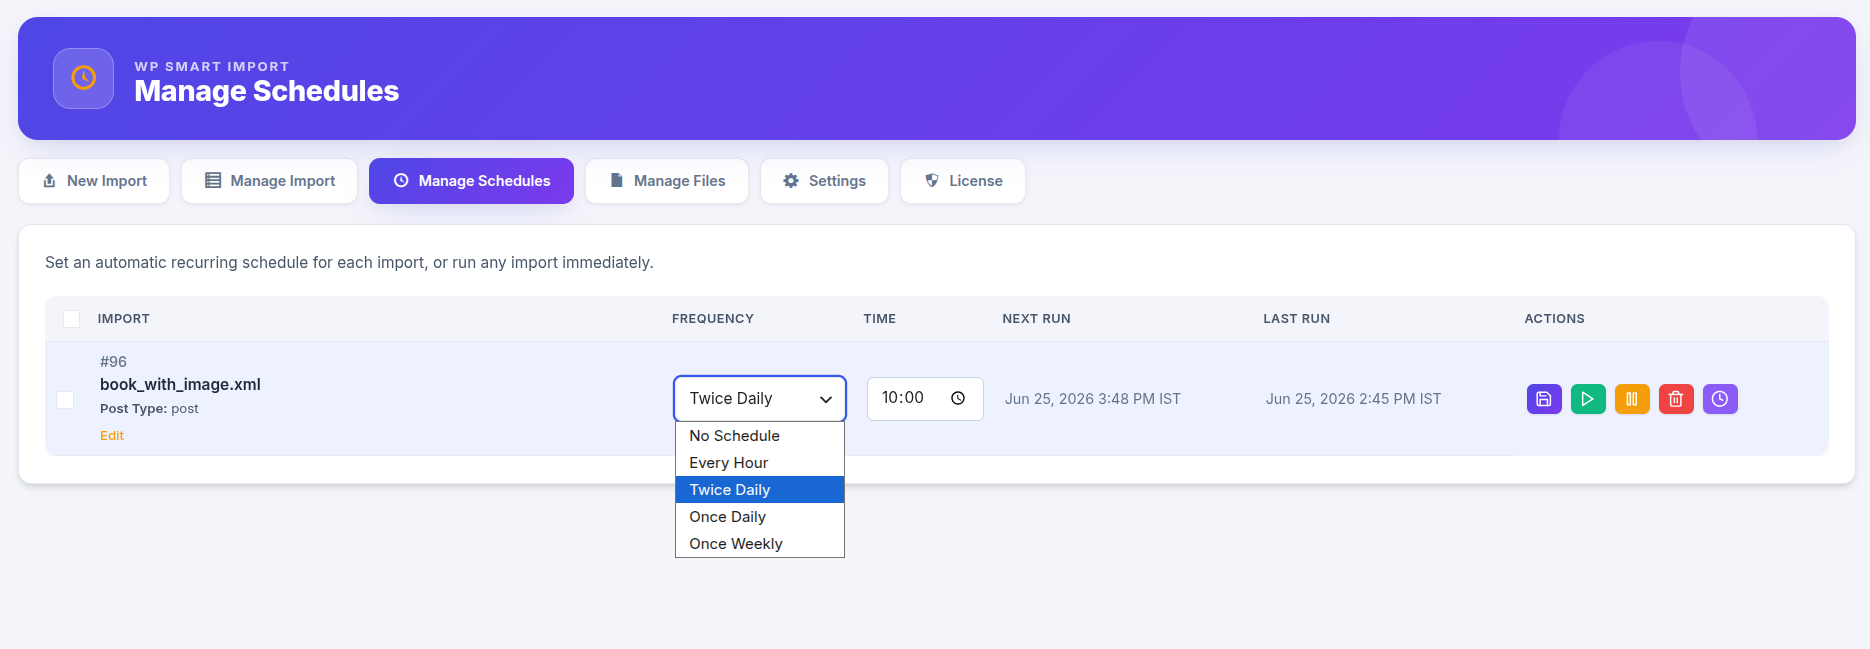
You can configure how often the import should run automatically. Locate your import in the table and select the desired interval from the Frequency dropdown:
- Manual (No Schedule) — Disables automatic execution.
- Every Hour — Triggers the import every hour.
- Twice Daily — Runs twice a day at 12-hour intervals.
- Once Daily — Runs once every day at a specific time.
- Once Weekly — Runs once a week on a selected day.
If you choose Once Daily or Twice Daily, a time selector field will appear under the Time column, allowing you to select the exact hour of day for execution.
Step 2 : Save and Update Schedule Settings
After making changes to the Frequency or Time values, click the Save (Disk) icon in the Actions column to store your schedule settings. Once saved, WP Smart Import will calculate the next execution time and display it under the Next Run column.
Step 3 : Control and Action Buttons
The Actions column offers several quick control buttons to manage each schedule:
- Save Schedule (Disk Icon) — Click this to save frequency and time updates.
- Run Import (Play Icon) — Instantly executes the import manually in the background, without waiting for the next cron schedule.
- Pause / Resume (Pause/Play Icon) — Temporarily suspends or resumes the automatic schedule.
- Delete Schedule (Trash Icon) — Deletes the scheduled cron task (Note: This keeps the import template intact, it only removes the automated schedule).
Step 4 : Real-time Monitoring & Progress Bar
When a scheduled import runs (either automatically via cron or triggered manually via the Play button), a real-time progress bar will appear under the schedule row.
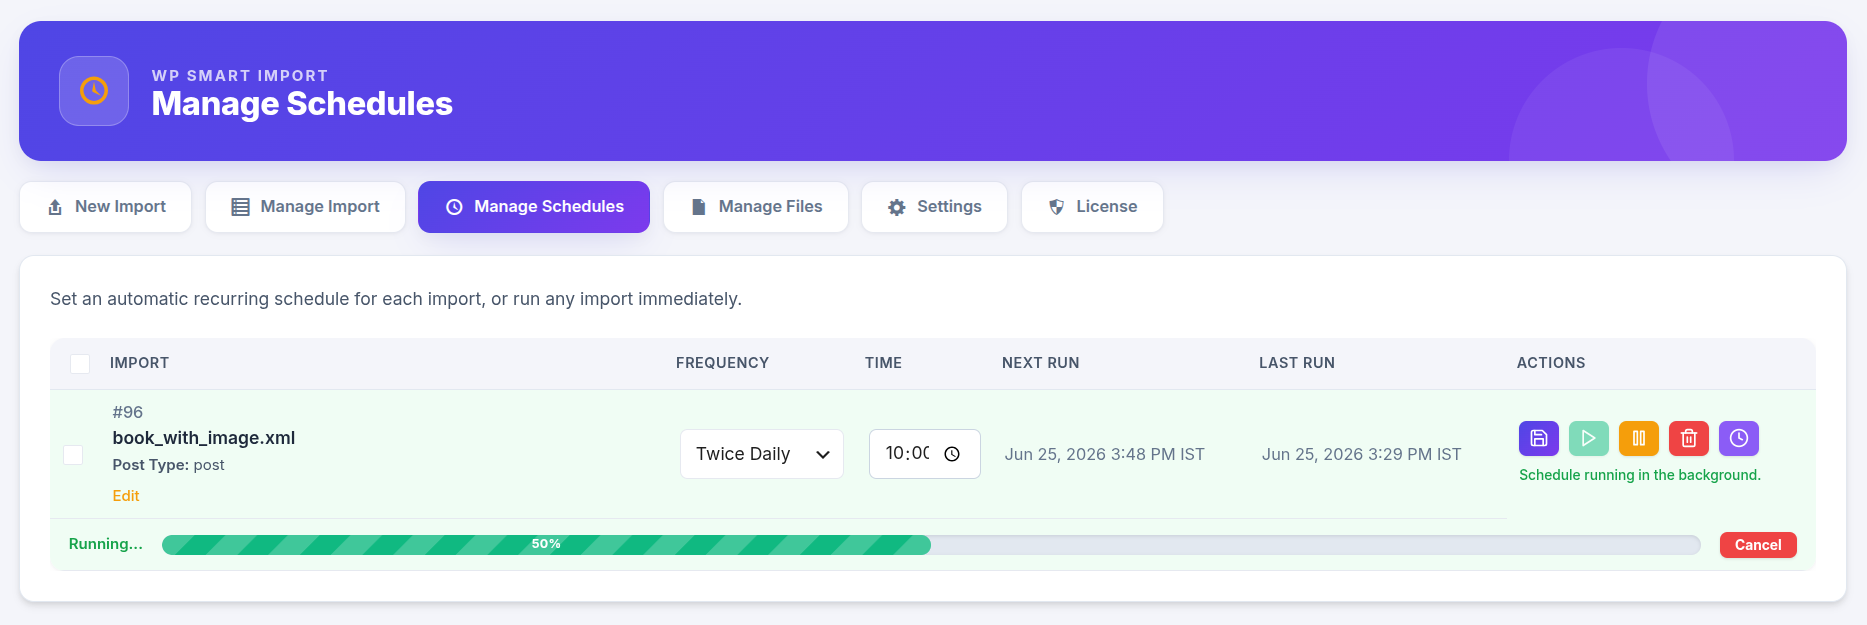
The progress bar displays the current completion percentage. You can monitor the import live, and if needed, click the red Cancel button next to the progress bar to safely stop the import process mid-run.
Step 5 : Setup Server Cron URL (Optional but Recommended)
By default, schedules rely on WordPress’s built-in cron system (WP-Cron), which is triggered only when someone visits your website. To ensure scheduled imports run precisely on time regardless of site traffic, we recommend setting up a system/server cron job.
Click the Cron Details (Clock/Link) icon in the Actions column. A modal will pop up showing the unique Cron URL for your import: