Learn how to use WP Smart Import’s drag & drop interface to import your XML, CSV, or Excel file.
First, you have to go to the WordPress admin panel -> WP Smart Import -> New Import. Click on New Import. You should see the following screen.
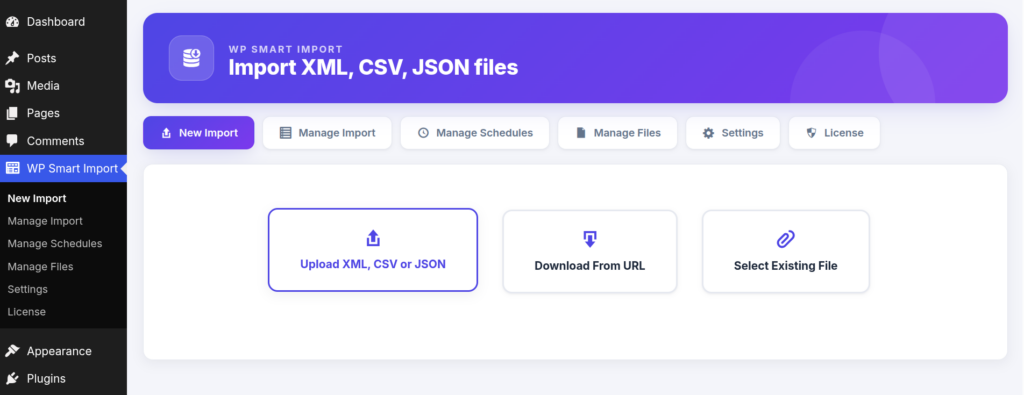
Now click on the Upload File button to select the XML sample data file from your computer which you would like to upload. Next, you should see the following screen.
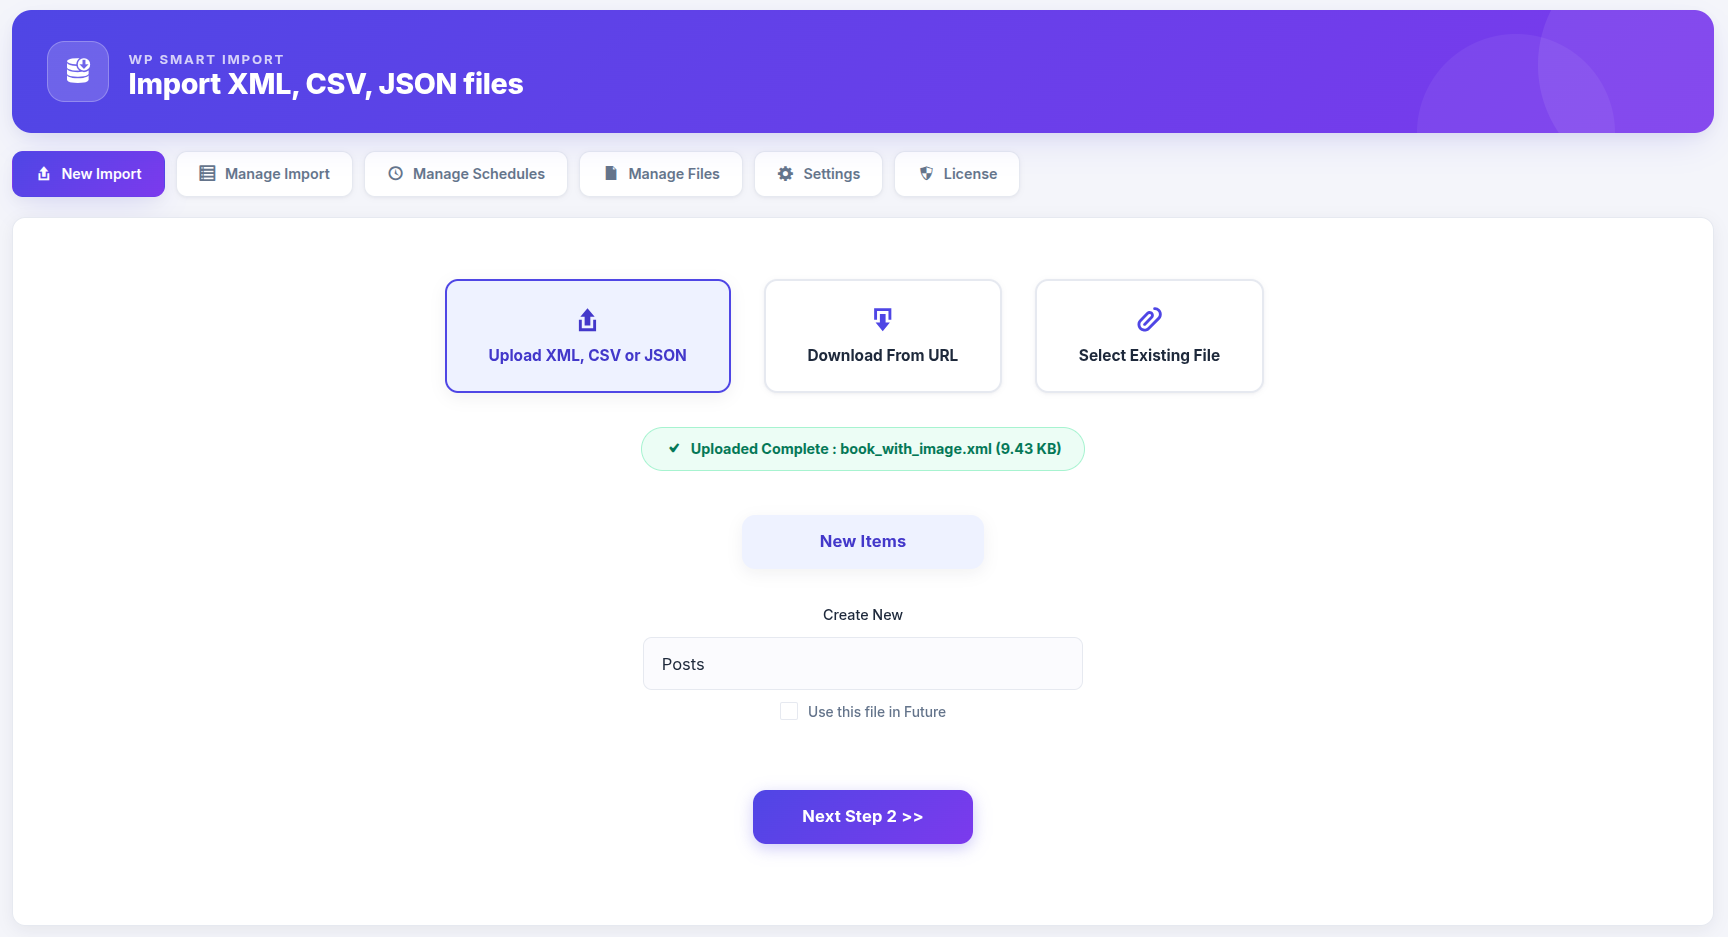
As per the above screen, for example, I have imported the book_with_image.xml file into new Posts. Then click on the Next Step 2 button.
WP Smart Import shows you elements in the XML file. In book_with_image.xml, there are 20 elements, which are displayed as per the screenshot below.
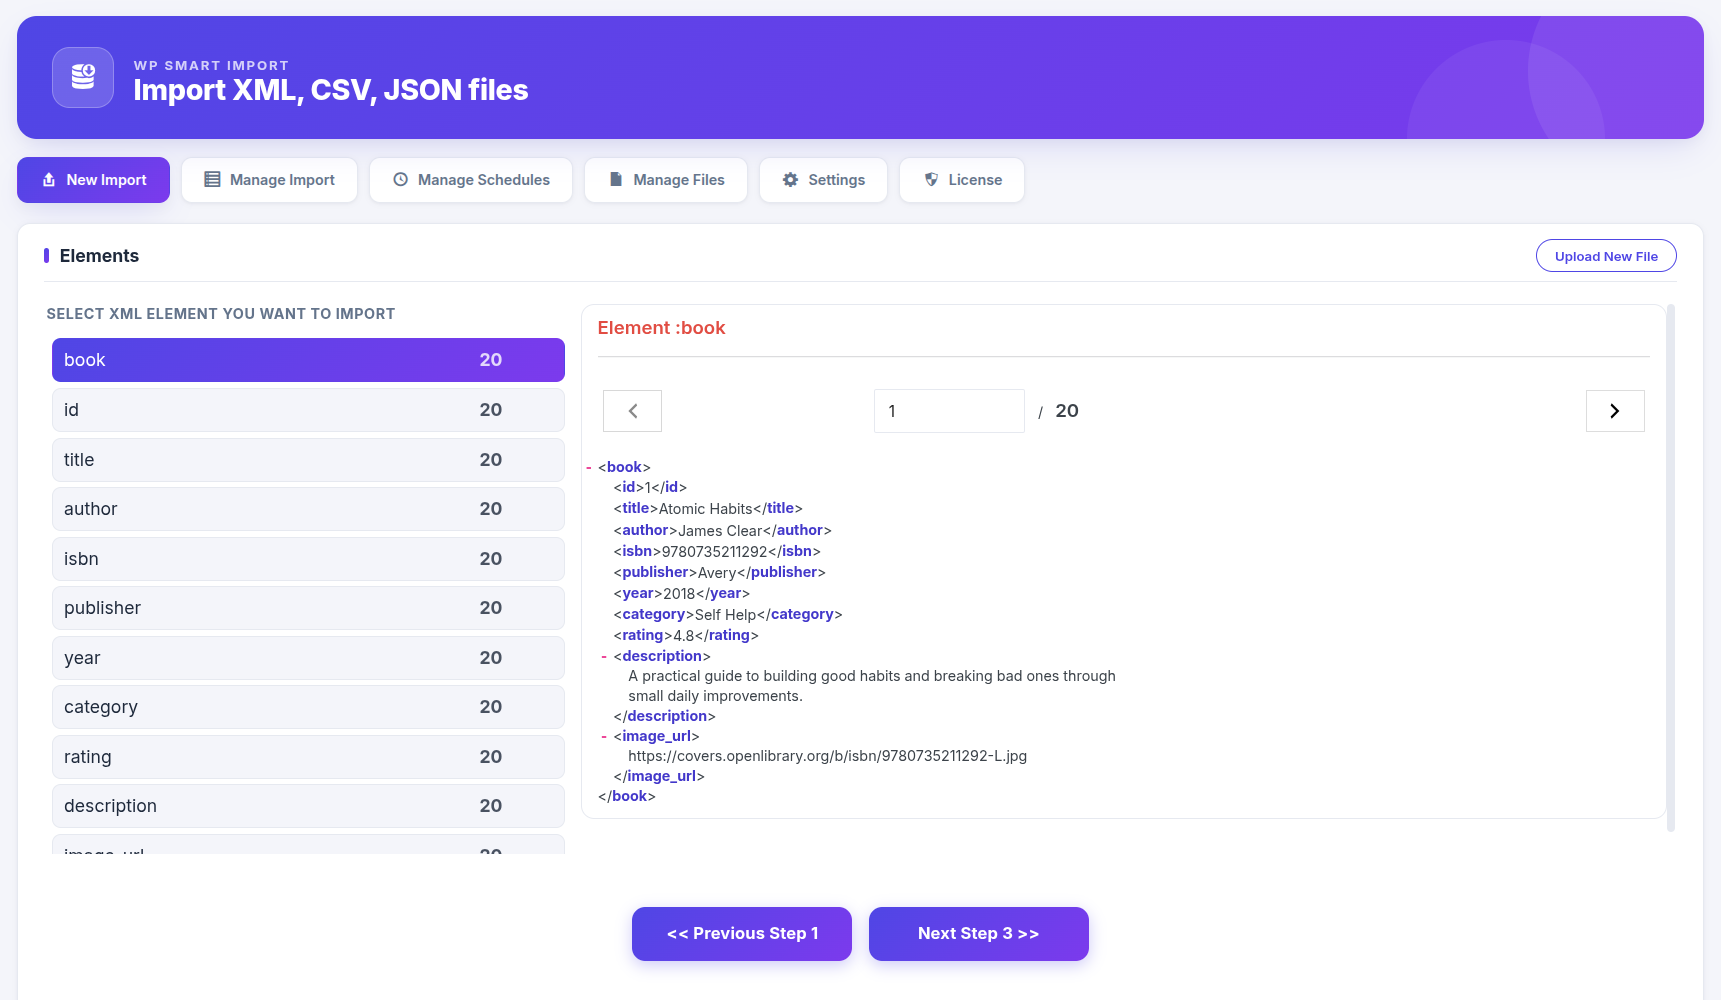
In the above screen, you can see 1 element of book on the right side. Let’s import 1 element of book and continue step 3. You should see the screen as per the screenshot below.
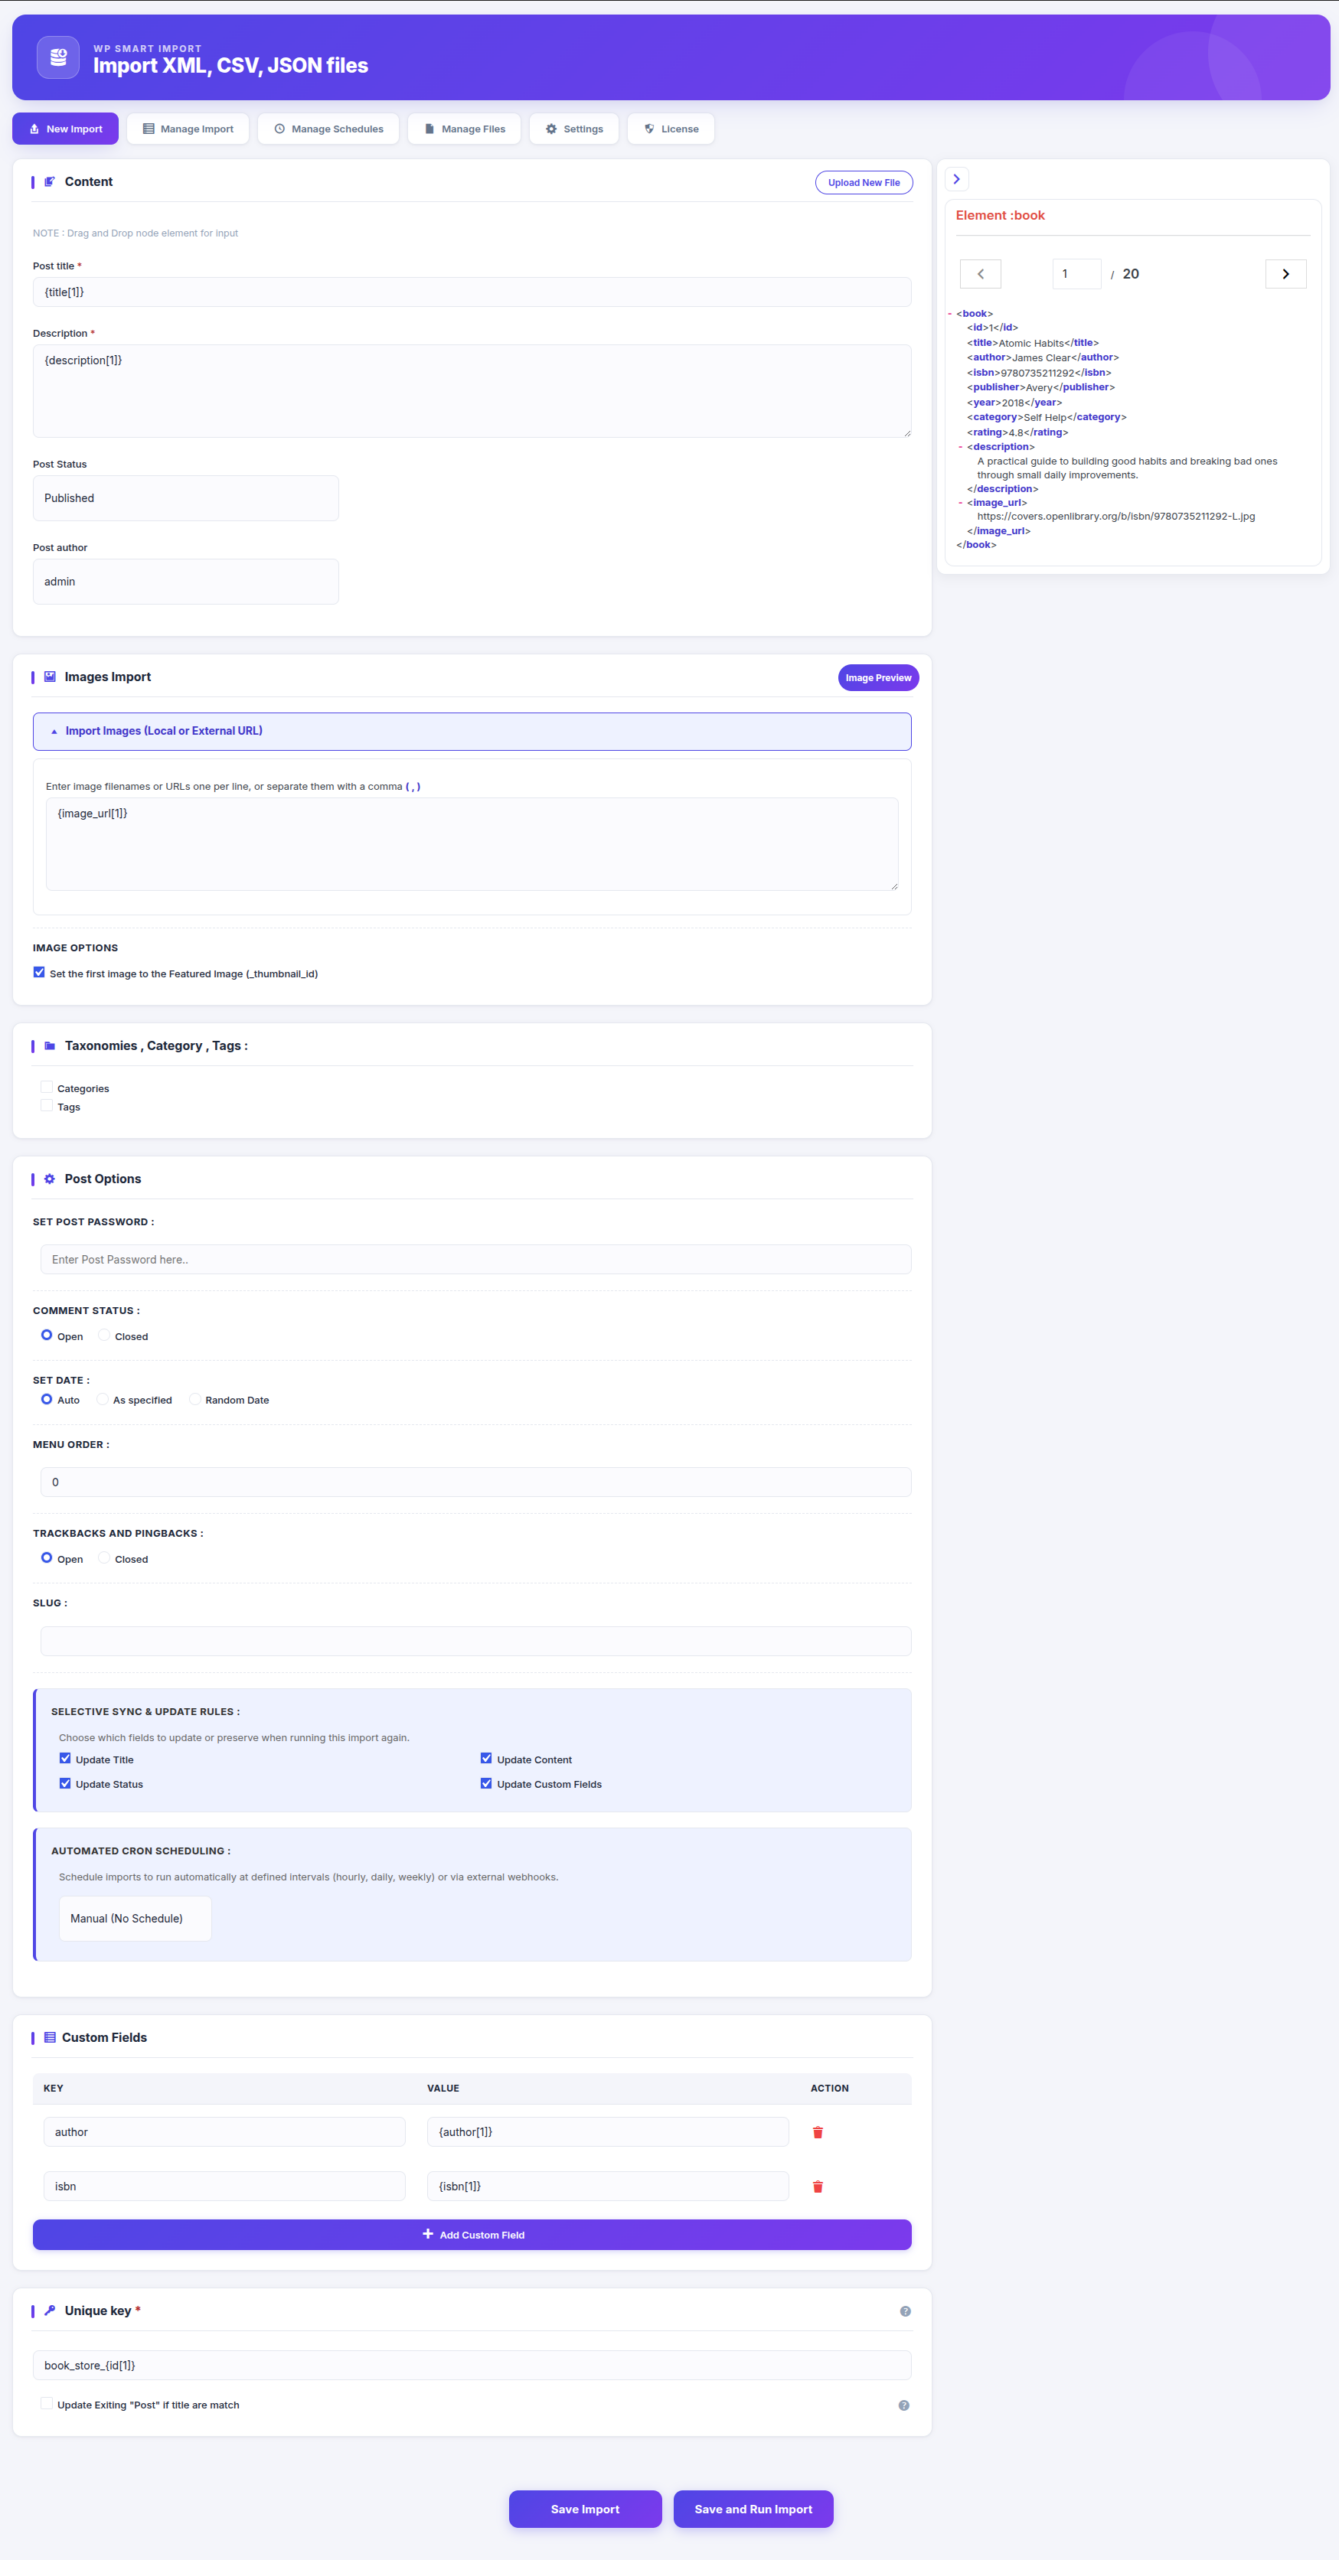
Now you can see the above screenshot determines the data on xml file is mapped to WordPress. The mapping screen is divided into multiple sections — each section is explained below.
Step 1 : Map Post Content (Title & Description)
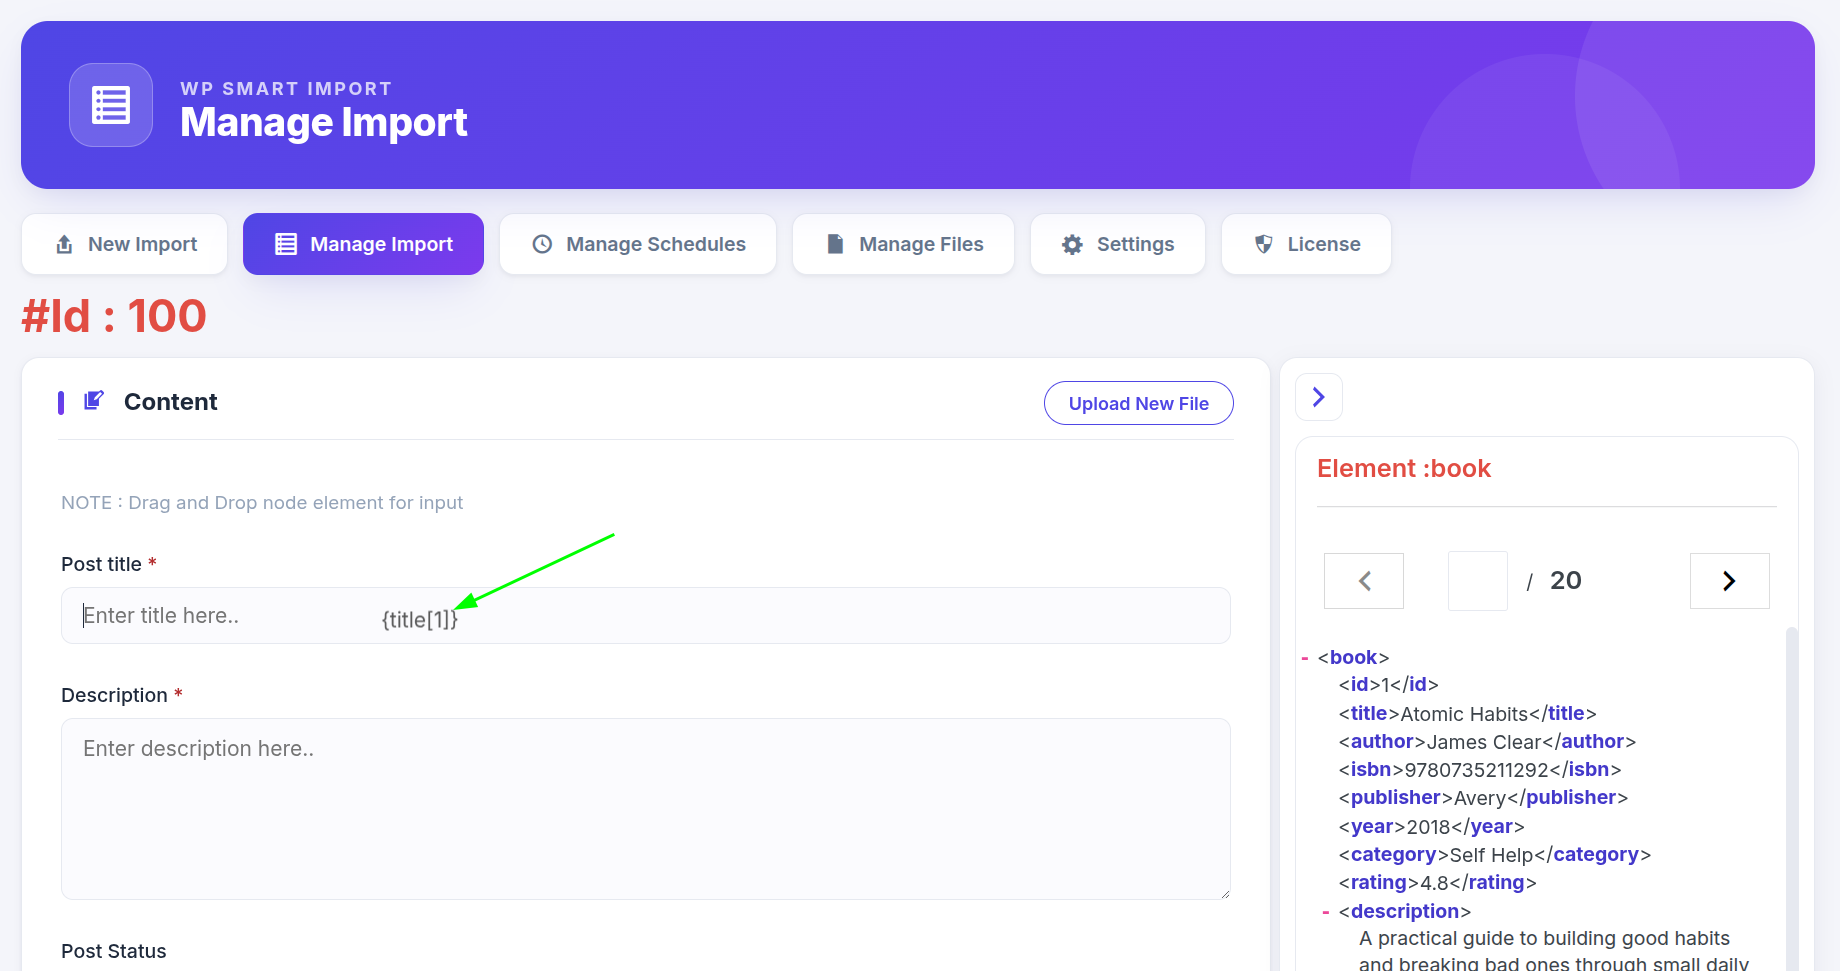
The Content section allows you to map your XML/CSV fields to the WordPress post’s Title and Description. Simply drag and drop the element from the right-side panel into the respective input box.
For example, drag the <title> element and drop it into the Post Title field, as shown in the screenshot below.
Now drag the {description[1]} element and drop it into the Description field, as shown below.
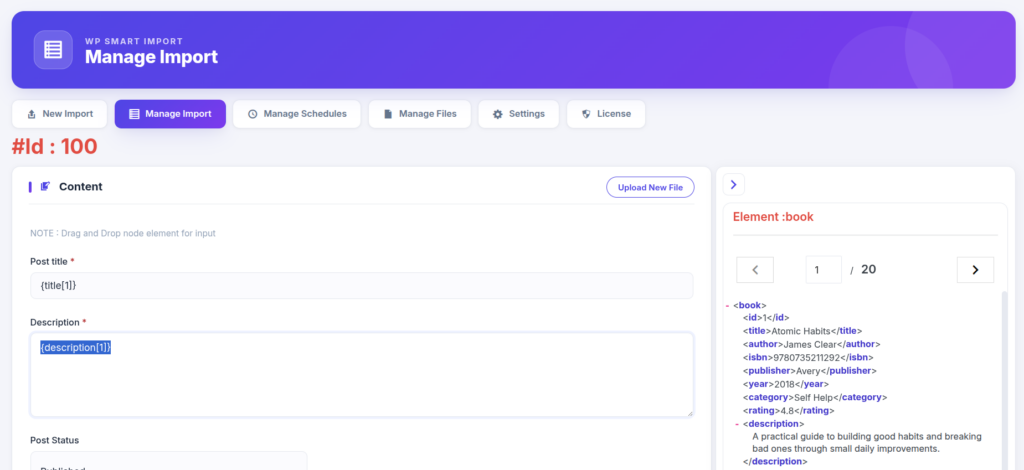
You can also set the Post Status (Published, Pending, Draft) and Post Author from the same Content section using the dropdown fields.
Step 2 : Import Images (Local or External URL)
The Images Import section allows you to import images directly into the WordPress Media Library. You can provide either a local image filename (stored on your server) or a full external image URL.
Drag and drop your image element (e.g., {image_url[1]}) from the element panel into the Images Import textarea, as shown below.
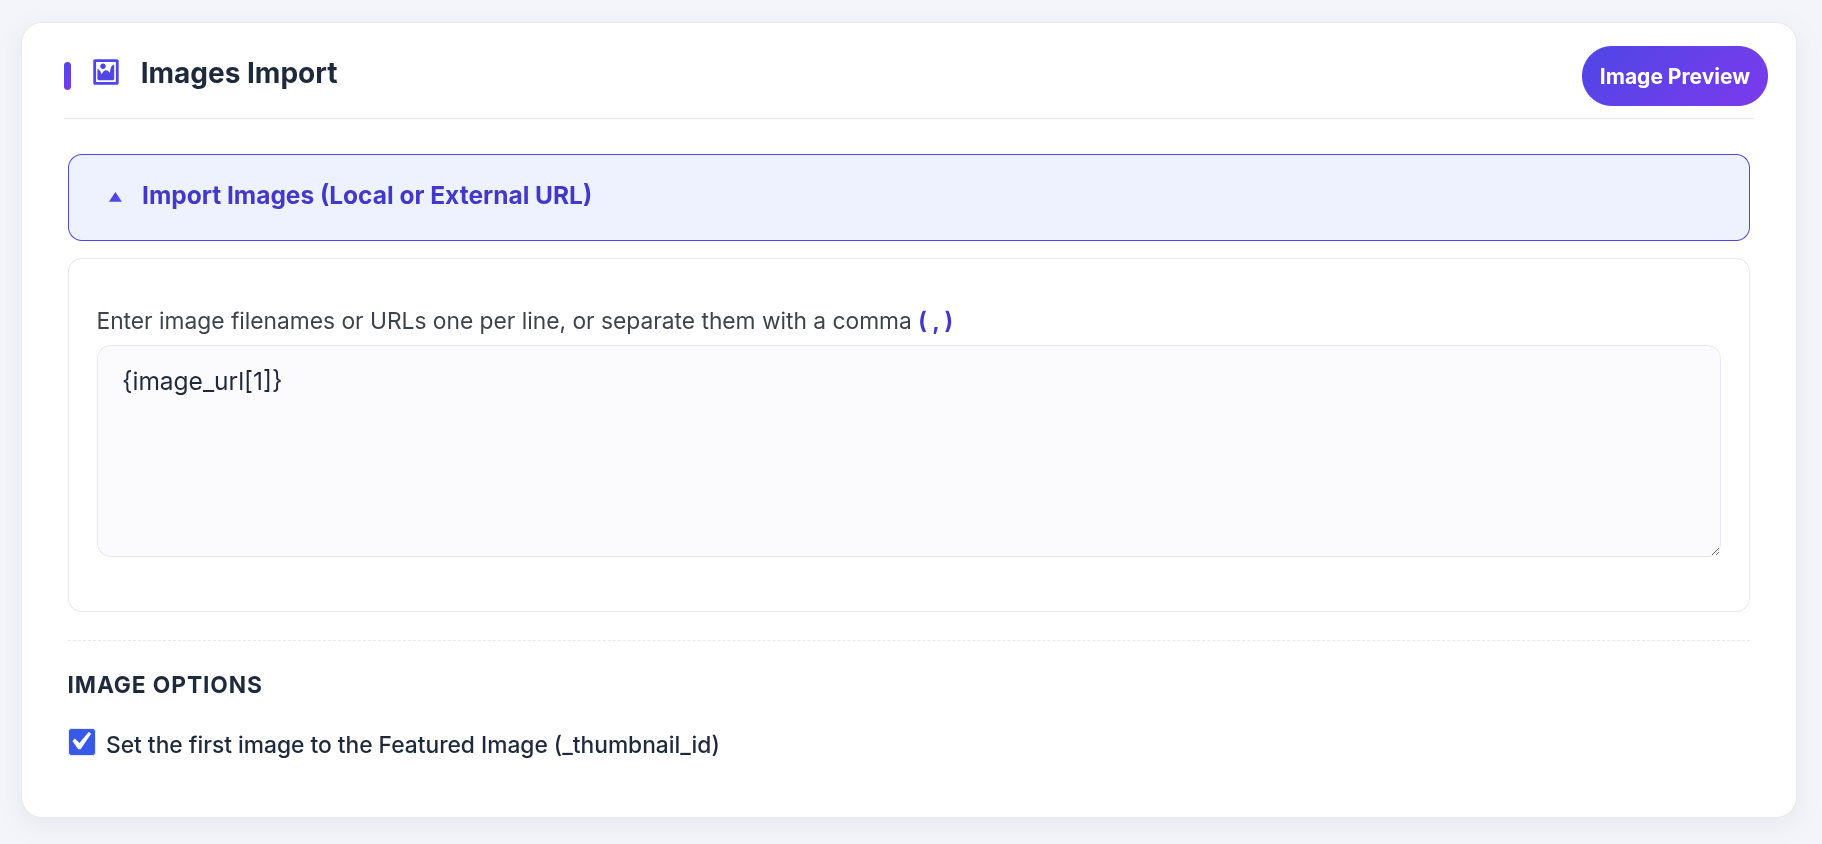
You can enter multiple image filenames or URLs — one per line, or separate them with a comma ( , ). Example:
{image_url[1]},https://example.com/image-2.pngOnce mapped, WP Smart Import will automatically download and upload each image into your WordPress Media Library during the import process.
Set as Featured Image
There is an option “Set the first image to the Featured Image”, when checked, the first image in the list will automatically be set as the post’s Featured Image (_thumbnail_id). This option is enabled by default.
Image Preview
You can click the Image Preview button in the Images Import section header to preview how images look for each element before running the import. You can navigate between elements using the previous/next arrows in the preview popup.
Duplicate Image Prevention
WP Smart Import automatically skips re-downloading images that were already imported in a previous import run. If the same image URL or filename is encountered again, the plugin reuses the existing media file from the library instead of creating a duplicate.
This ensures:
- No duplicate images in your Media Library
- Saves server storage space
- Faster re-imports and scheduled imports
Step 3 : Import Taxonomies, Category & Tags
The Taxonomies, Category, Tags section lets you map your XML/CSV data to WordPress categories and tags. You can import categories by enabling the Categories checkbox, and similarly enable Tags for tag mapping.
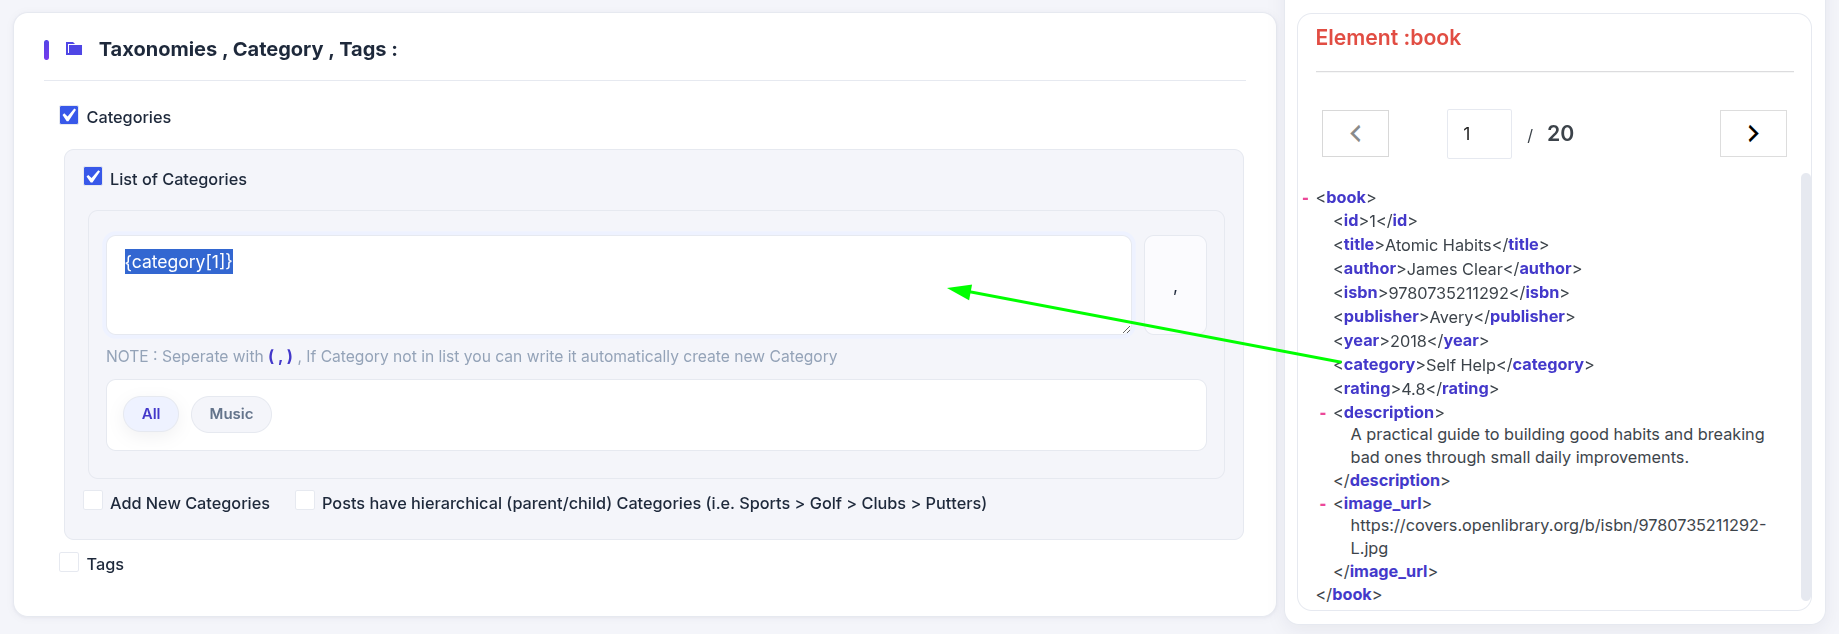
Drag and drop the genre or category element from the XML panel into the Category box. You can separate multiple values with a comma ( , ). If a category does not already exist, WP Smart Import will automatically create it.
Hierarchical Categories
If your data has parent/child category relationships (e.g., Sports > Golf > Clubs > Putters), enable the “Posts have hierarchical (parent/child) Categories” option and use ( > ) as the separator.
Tags
Similarly, enable the Tags checkbox and drag your tag-related elements into the Tags field. Multiple tags can be separated by a comma ( , ). New tags that don’t exist in WordPress will be created automatically during import.
Step 4 : Post Options
The Post Options section gives you additional control over how posts are created during import. The available options are:

- Post Password — Set a password to protect imported posts.
- Comment Status — Choose whether comments are Open or Closed for imported posts.
- Set Date — Set the post date to Auto (current date), a Specific date, or a Random date within a range.
- Menu Order — Map a field (e.g.,
{id[1]}) to control the menu order of the post. - Trackbacks and Pingbacks — Set the ping status to Open or Closed.
- Slug — Optionally map a custom slug for the post URL. If left empty, WordPress uses the sanitized post title as the default slug.
Selective Sync & Update Rules
With the Selective Sync & Update Rules feature (available in the Pro version), you can choose exactly which fields get updated when re-running an import on already existing posts. For example, you can update the content while keeping the existing title unchanged.
Available update rules:
- Update Title
- Update Content
- Update Status
- Update Custom Fields
Automated Cron Scheduling
The Automated Cron Scheduling feature (Pro) lets you schedule your import to run automatically at defined intervals — every hour, twice daily, once daily, or once weekly — without any manual action required.
Available schedule options:
- Manual (No Schedule)
- Every Hour
- Twice Daily
- Once Daily (with specific time)
- Once Weekly
For Daily and Twice Daily schedules, you can also pick the exact time of day when the import should run.
Step 5 : Import Custom Fields
The Custom Fields section lets you map any additional data from your XML/CSV file to WordPress post meta (custom fields). In the book_with_image.xml file, fields like author, ISBN, publisher, rating, and image URL are mapped as custom fields.
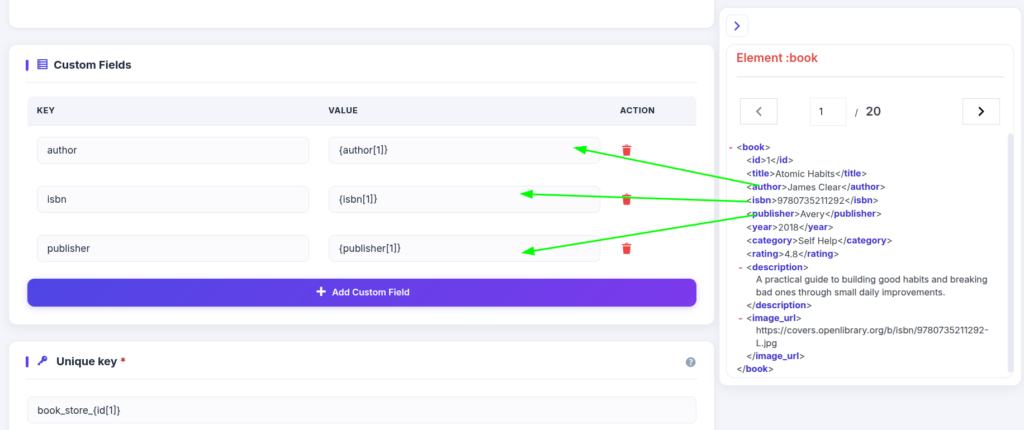
For each custom field, enter the Key (the meta key name that will be saved in WordPress) and drag and drop the corresponding XML element as the Value. For example:
- Key:
author→ Value:{author[1]} - Key:
isbn→ Value:{isbn[1]} - Key:
publisher→ Value:{publisher[1]}
You can add as many custom fields as needed by clicking the “+ Add Custom Field” button, and remove any row using the trash icon.
Step 6 : Set Unique Key
The Unique Key is a required field that WP Smart Import uses to uniquely identify each record during import. It is used for retrieve, update, and delete operations — so the plugin knows whether to create a new post or update an existing one.
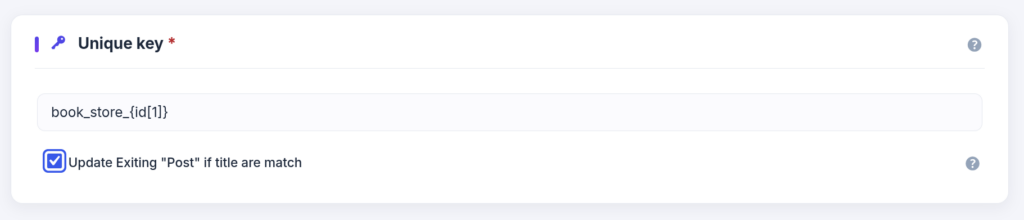
Enter a unique identifier from your data file, such as {id[1]}. Note that XPath expressions do not work in the Unique Key field — use only simple element placeholders.
You can also enable the option “Update Existing Post if title matches”,when checked, if a post with the same title already exists in WordPress, it will be updated instead of creating a duplicate.
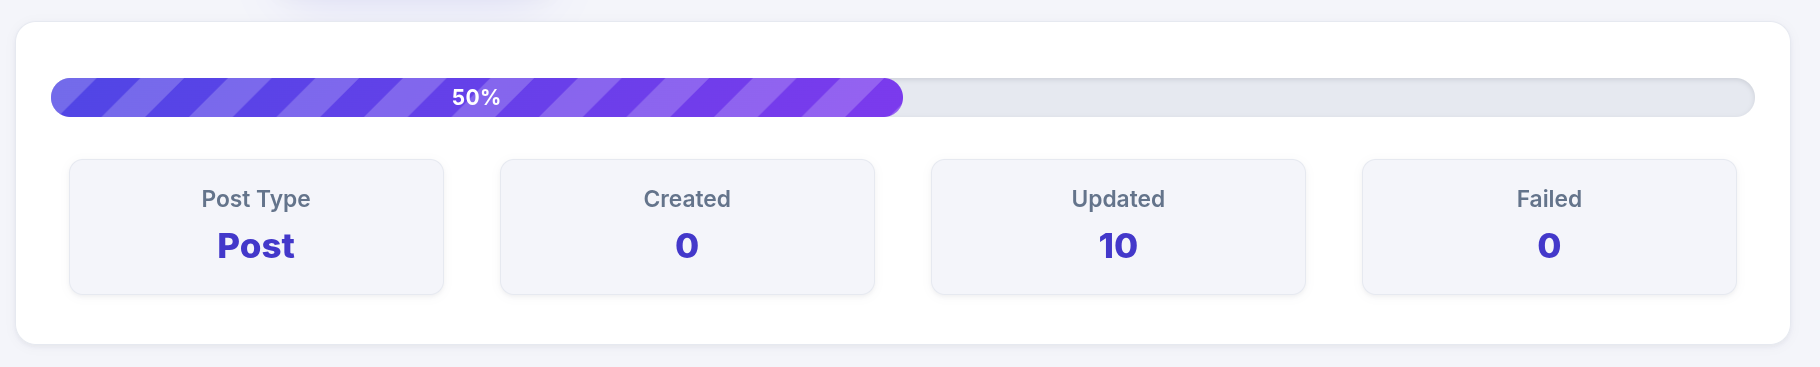
Save and Run Import
Once all fields are mapped and settings are configured, click on Save and Run Import. It will redirect you to the Manage Import screen where you can see the import progress.
Once the import is complete, you will see a success message showing the total number of posts imported.
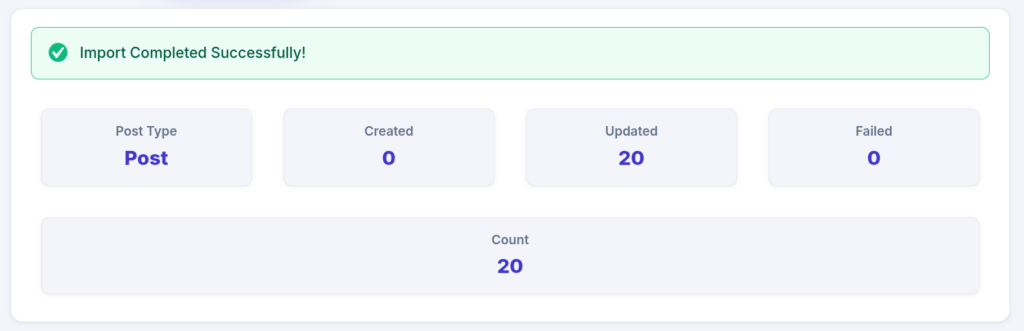
Go to Posts, you will see all records imported successfully. This is how you can import XML, CSV, JSON, and REST API data into WordPress using the WP Smart Import plugin.