
The Live Feed is the fastest way to show Eventbrite, Meetup or Facebook events on your site. There is no API key, no developer app and no login involved for any of the three platforms — just point it at a public source and publish.
Step 1: Open the Live Feed builder
Go to WordPress Admin > Event Aggregator > Live Feed > Add New.
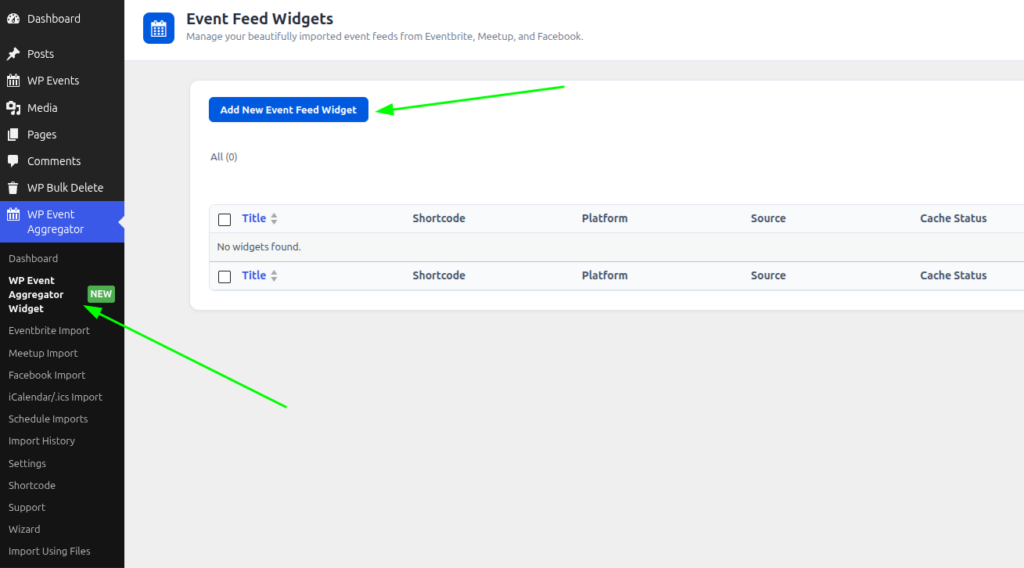
Step 2: Give your feed a name
This name is only for your own reference inside the admin (e.g. “Homepage Events”), it is not shown to visitors.
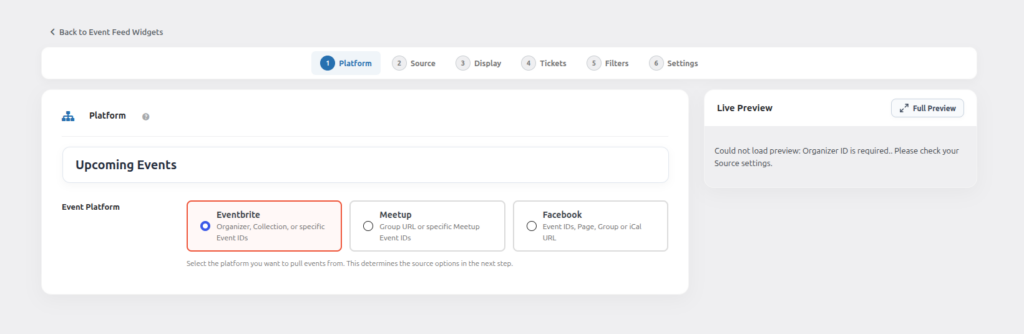
Step 3: Choose your platform
In the Platform tab, pick Eventbrite, Meetup or Facebook. This choice decides which fields you see in the Source, Tickets and Filters tabs next.
- Eventbrite — Organizer, Collection, or specific Event IDs.
- Meetup — Group ID or specific Event IDs.
- Facebook — Event IDs, Page, Group or iCal URL.
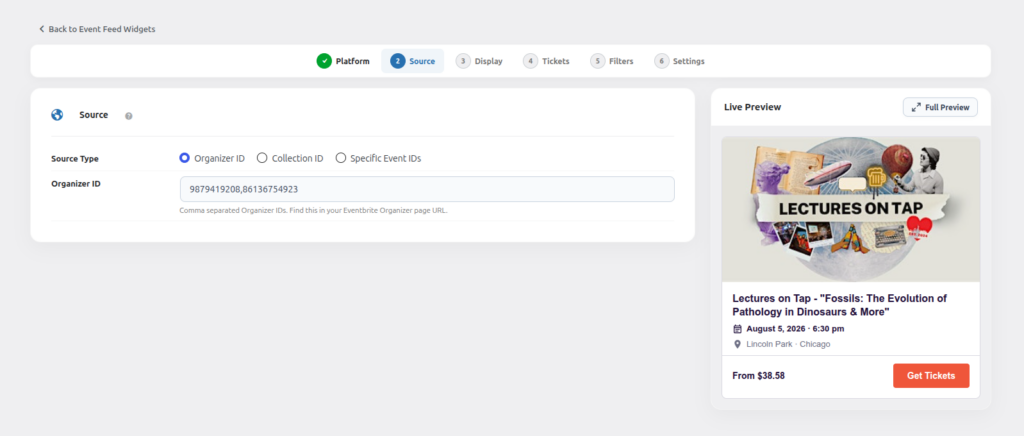
Step 4: Add your source
Switch to the Source tab and enter the ID/URL for the source type you picked. See Live Feed – Platform & Source Options for the exact field and an example for every platform.
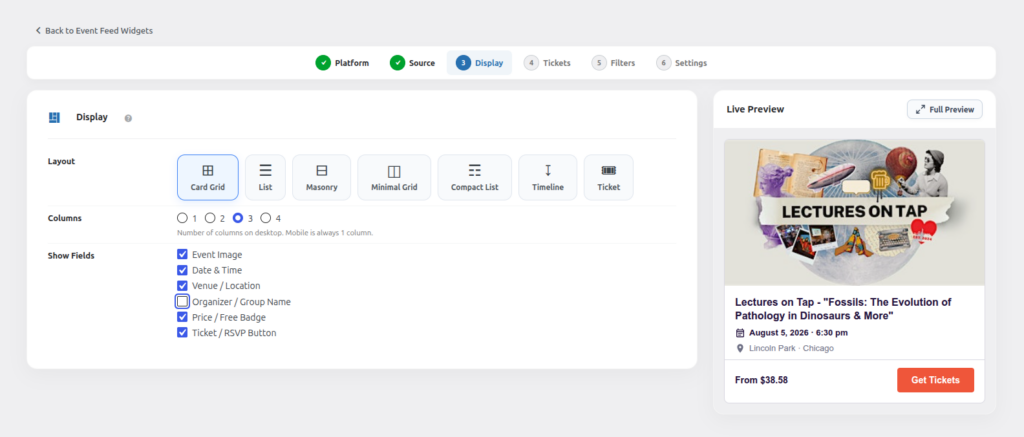
Step 5: Choose a layout
Switch to the Display tab and pick a layout — Card Grid, List, Masonry, Minimal Grid, Compact List, Timeline or Ticket. Choose how many columns to show on desktop, and toggle which fields (image, date, venue, price, etc.) appear on each card.
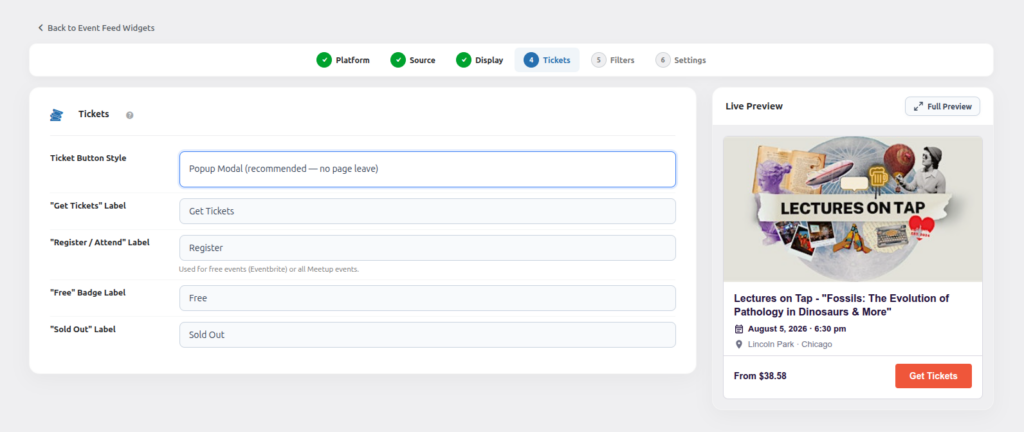
Step 6: Set up your ticket/button labels
Switch to the Tickets tab and set your own text for the “Get Tickets”, “Register / Attend” and “Free” badge labels. Eventbrite feeds can also choose between a Popup Modal or a direct link to the Eventbrite page. See Live Feed – Buttons & Ticket Labels for full details.
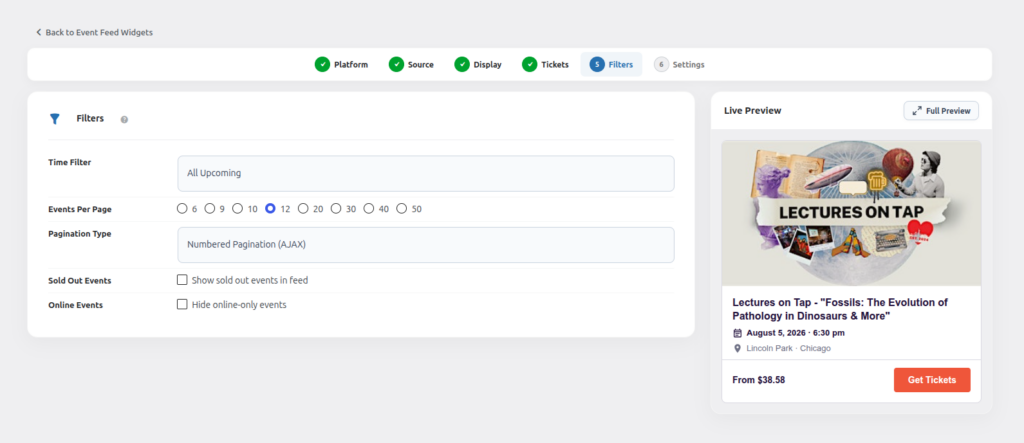
Step 7: Set your filters
Switch to the Filters tab to control which events show up (Today, Upcoming Week, Custom Date Range, etc.), how many load per page, and the pagination style. See Live Feed – Filters & Pagination for full details.
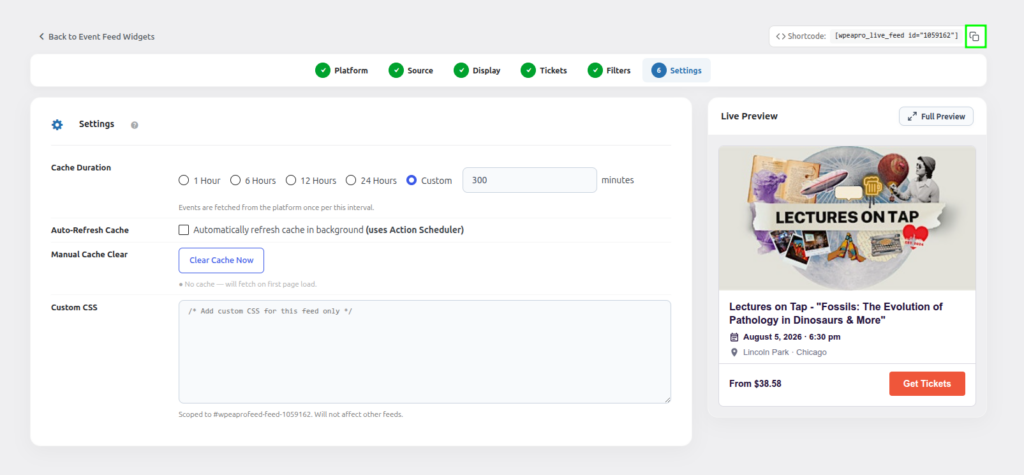
Step 8: Configure cache & custom CSS
Switch to the Settings tab to set the cache duration, turn on background auto-refresh, and add any custom CSS scoped to this feed. See Live Feed – Cache, Auto-Refresh & Custom CSS for full details.
Step 9: Publish and copy the shortcode
Click Publish. A shortcode box appears at the top of the builder — click it to copy.

[wpeapro_live_feed id="123"]
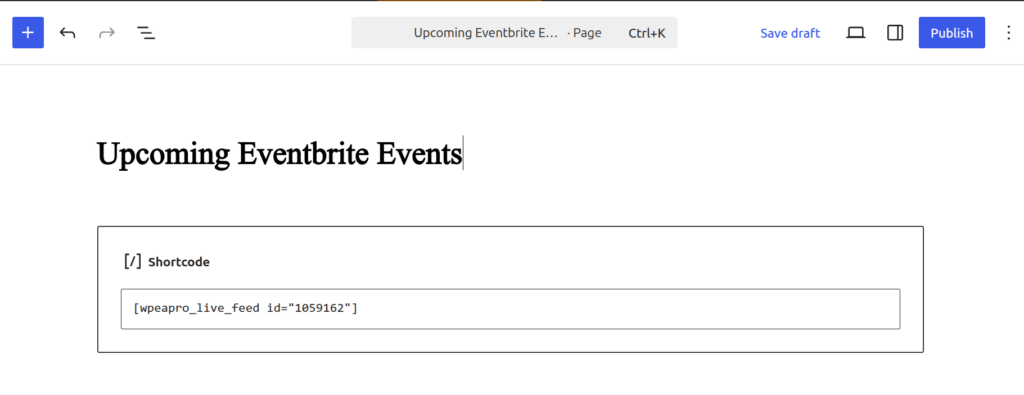
Step 10: Paste it on any page or post
Open the page where you want events to appear, add a Shortcode block (or a Classic Editor shortcode box) and paste the code from Step 9. Publish/update the page.
Result
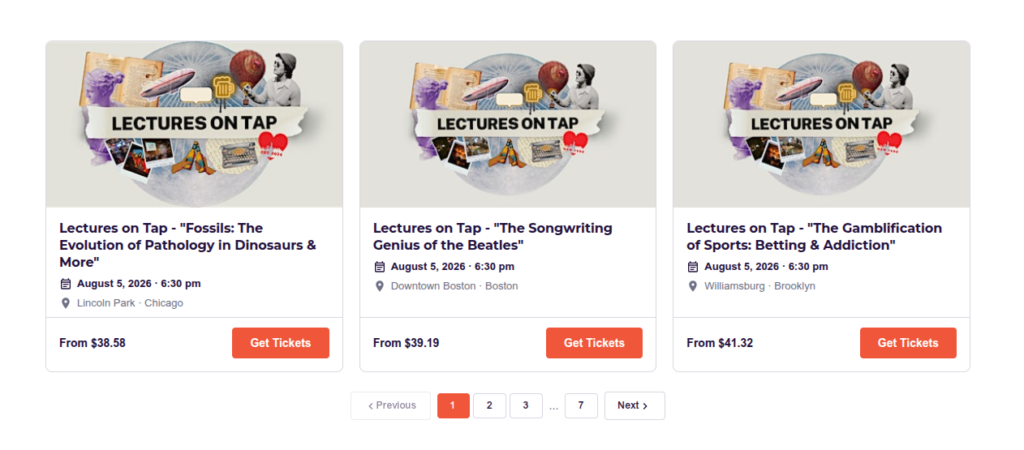
Your events are now live on your website. The plugin fetches events from the selected platform in the background and caches them, so your page stays fast — see Live Feed – Cache, Auto-Refresh & Custom CSS for how caching works.
What to configure next
- Platform & Source Options — exact source fields and examples for Eventbrite, Meetup and Facebook.
- Layouts & Display Settings — all 7 layout styles and which fields to show on each card.
- Buttons & Ticket Labels — customize button text and ticket/RSVP behaviour per platform.
- Filters & Pagination — date-range filters, events per page, pagination style.
- Cache & Custom CSS — set the cache duration, enable background auto-refresh, and add feed-scoped custom CSS.
- Shortcode Reference — every attribute you can pass manually.