
Once you’ve switched an email on under Settings: Notifications, the Email Templates tab is where you control exactly what it looks like: subject line, sender/recipient, and a full HTML body — complete with a live preview and a one-click test send. No other tab gives you this level of control over your notification emails.
The Four Email Templates
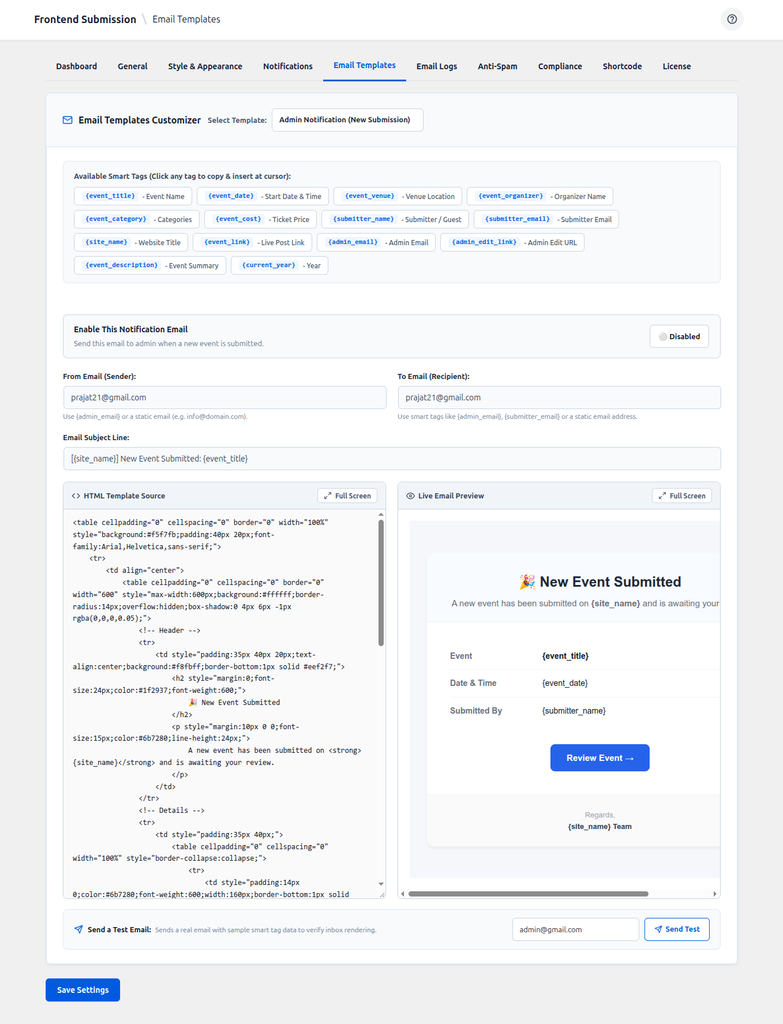
Use the Select Template dropdown at the top of the card to switch between all four editable emails:
- Admin Notification (New Submission): Sent to you when a new event comes in.
- Submitter Confirmation (Upon Submit): The “we received your event” receipt sent to the submitter.
- Event Approved & Published: Sent to the submitter the moment you approve/publish their event.
- Event Rejected / Declined: Sent to the submitter if you decline or trash their submission.
Each of the four has its own independent Enabled/Disabled switch at the top of its pane, plus its own From email, To email, Subject, and HTML body — so you can, for example, keep the approval email on but switch off the rejection email if you’d rather deliver that news personally.
Editing a Template
- Pick the template you want to edit from the dropdown.
- Set From and To — use a Smart Tag like
{admin_email}or{submitter_email}, or type a static address. - Edit the Subject line.
- Edit the HTML in the HTML Template Source box on the left — the Live Email Preview on the right updates as you type. Use the Full Screen button on either column if you need more room to work.
- Click Save Settings at the bottom of the page to store your changes.
Smart Tags (Merge Tags)
Smart Tags are placeholders the plugin automatically replaces with real data before sending. Click any tag chip above the editor to copy it and insert it at your cursor position. The full set available:
| Smart Tag | Replaced with |
|---|---|
{event_title} | Event name |
{event_date} | Start date & time |
{event_venue} | Venue location |
{event_organizer} | Organizer name |
{event_category} | Event categories |
{event_cost} | Ticket price |
{event_description} | Event summary/excerpt |
{event_link} | Live post URL (once published) |
{submitter_name} | Submitter or guest name |
{submitter_email} | Submitter email address |
{site_name} | Your website’s title |
{admin_email} | Site admin email |
{admin_edit_link} | Direct wp-admin edit link for the event |
{current_year} | The current year (handy for a footer copyright line) |
Sending a Test Email
Never guess how an email will render in a real inbox. At the bottom of each template pane, type an email address into the Send a Test Email field and click Send Test — the plugin sends a real email using that template filled with sample data, so you can check formatting, images and links in Gmail, Outlook, or wherever you actually read mail.
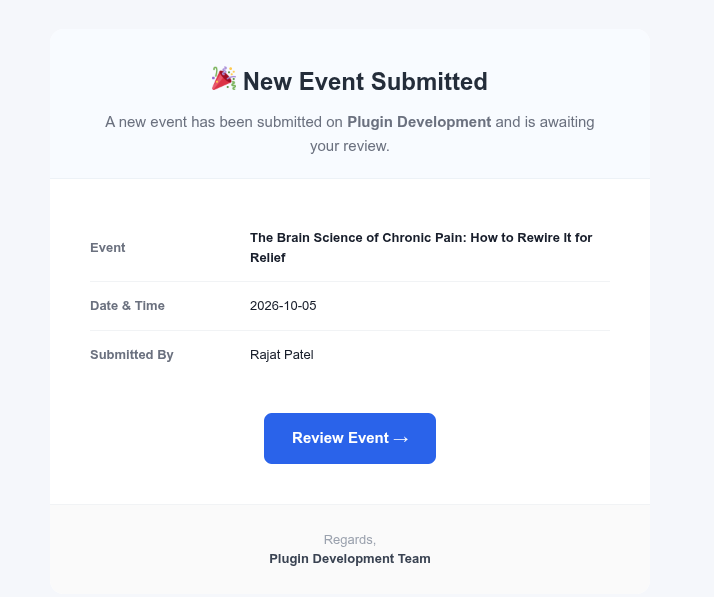
Every test send (and every real notification email) is automatically recorded on the Email Logs tab, so you can always confirm it actually went out.